Harvesting leafy greens efficiently is one of the most important tasks for small-scale farmers and market gardeners. A quick cut greens harvester DIY project allows growers to reduce the time and labor needed for harvesting crops like lettuce, spinach, arugula, and baby kale. Building your own greens harvester is both cost-effective and customizable, making it a great option for farms of all sizes. By using easily available components and basic tools, you can construct a reliable tool that simplifies your harvest process and increases productivity.
What Is a Quick Cut Greens Harvester?
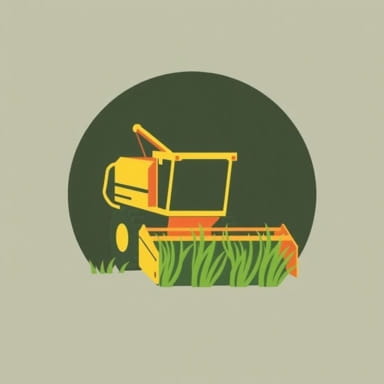
A quick cut greens harvester is a handheld or mechanized harvesting tool designed to quickly cut through rows of leafy greens. It combines a reciprocating cutting blade with a rotating or static basket to collect the harvested greens. The DIY versions are inspired by commercial models but use accessible and affordable materials, making them ideal for budget-conscious growers or homesteaders.
Advantages of DIY Greens Harvesters
- Reduces harvest time significantly
- Improves consistency in cut height
- Minimizes leaf damage compared to manual cutting
- Cost-effective compared to commercial alternatives
Materials Needed for a DIY Quick Cut Greens Harvester
Building a functional greens harvester can be done using materials sourced from hardware stores or recycled tools. Below is a list of components commonly used in DIY versions:
- Bread knife or electric carving knife (cutting blade)
- Handheld reciprocating saw (to power the blade)
- Plastic tote or basket (to collect greens)
- Aluminum or PVC tubing (for frame construction)
- Zip ties, bolts, and screws (for assembly)
- Mesh screen or netting (optional for airflow)
The goal is to securely attach the knife to a vibrating mechanism, such as a reciprocating saw, and create a structure that holds a collection bin directly behind the blade.
Step-by-Step Guide to Building a Greens Harvester
Step 1: Construct the Frame
Begin by building a lightweight but durable frame using PVC or aluminum tubing. This frame will hold both the reciprocating saw and the basket. The frame should be shaped like an open box, wide enough to span a typical row of greens usually 12 to 18 inches wide.
Step 2: Mount the Reciprocating Saw
Secure a cordless or corded reciprocating saw horizontally to the top of the frame using clamps, brackets, or zip ties. Ensure that the saw blade extends forward and slightly downward so that it makes contact with the base of the plants when you push the tool forward. Use a serrated blade or bread knife blade for clean cuts.
Step 3: Attach the Collection Bin
Fix a plastic bin or tote to the bottom rear of the frame. As the blade cuts the greens, they will fall backward into the bin. Some DIYers attach the bin with hinges or velcro to make cleaning and emptying easier.
Step 4: Add Support and Safety Features
Include handle grips for comfort and better control. You may also want to attach a protective guard around the blade area to prevent accidental contact with the user’s hands or legs. Safety goggles and gloves are highly recommended during operation.
Tips for Using a DIY Greens Harvester
Once assembled, the quick cut greens harvester should be used carefully and efficiently to optimize results. Below are some tips to get the most out of your tool:
- Harvest early in the morning when greens are crisp and cool
- Keep the blade clean to avoid plant sap buildup
- Move the tool at a steady pace to ensure even cutting
- Avoid cutting too close to the soil to reduce debris collection
- Clean and sanitize all parts after each use to maintain food safety
Maintenance and Storage
Like all farm tools, proper maintenance ensures a longer life and better performance. Regularly check all fasteners and attachments for wear and tear. Keep the blade sharp and rust-free. After each harvest session, remove leftover greens, hose down the tool, and let it dry completely before storage.
Storage Tips
- Store in a dry, shaded area to prevent corrosion
- Disconnect batteries if using a cordless saw
- Cover with a tarp or store in a bin to keep dust off
Benefits of Quick Harvesting for Small Farms
Time is a valuable resource for farmers, and harvesting by hand can be a slow and exhausting task. By investing a little time into creating a quick cut greens harvester DIY, small farmers can improve the quality and speed of their operations. More consistent harvests mean higher product quality, which can lead to better customer satisfaction at farmers’ markets or in CSA programs.
Additional Benefits
- Reduces labor costs over time
- Encourages more frequent harvesting, promoting better regrowth
- Allows for better planning of planting and harvest schedules
Customizing Your Greens Harvester
Each farm is different, and one of the advantages of building your own greens harvester is that it can be customized to your specific needs. You can change the width of the frame, the size of the basket, or the power source depending on the crops you grow and the size of your fields.
Ideas for Customization
- Add a small fan to blow debris away from the harvested greens
- Install wheels on the base for smoother motion over soil
- Use stainless steel components for better durability
- Adjust the blade angle to suit different plant heights
Creating a quick cut greens harvester DIY version is a practical project that offers immense value to small-scale growers. With just a few tools and some creativity, you can build a reliable device that streamlines your harvest process and saves countless hours of labor. Whether you operate a backyard garden or a larger market garden, this tool can help improve efficiency, reduce strain, and make harvesting leafy greens more enjoyable. The key is to design it to suit your own farm’s layout and needs while following safety best practices throughout construction and use.