Drawing a bullfrog may seem challenging at first, but with some guidance and practice, anyone can sketch this fascinating amphibian with confidence. Known for their large eyes, wide mouths, and powerful hind legs, bullfrogs have unique physical features that make them an interesting subject for art. Whether you’re a beginner looking to learn basic drawing techniques or someone with experience in sketching animals, understanding how to draw a bullfrog step-by-step can make the process much easier and more enjoyable.
Getting to Know the Bullfrog
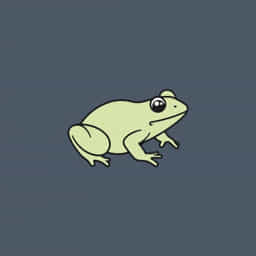
Before putting pencil to paper, it’s helpful to understand the basic structure and proportions of a bullfrog. Bullfrogs are large amphibians with smooth, moist skin, typically olive green or brown with darker blotches. Their heads are broad, with bulging eyes set high, and they have strong, muscular back legs for jumping and swimming. This basic knowledge will help you capture their essence in your drawing.
Materials You Will Need
To draw a bullfrog, you don’t need expensive materials. Start with simple tools:
- Pencil (HB for sketching, 2B or 4B for shading)
- Eraser (kneaded or regular)
- Sharpener
- Paper (any drawing or sketchbook paper works well)
- Blending stump or cotton swab for shading (optional)
Once you’re comfortable with the sketching process, you can add colored pencils, markers, or watercolors for a more detailed and vibrant illustration.
Step-by-Step Guide on How to Draw a Bullfrog
Step 1: Draw the Basic Shapes
Begin by drawing simple shapes that form the foundation of the bullfrog’s body. Start with an oval for the head and a larger, slightly flattened oval for the body, overlapping slightly with the head. These shapes will guide the overall proportions.
Step 2: Add the Eyes and Mouth
Bullfrogs have large, round eyes that protrude from the top of the head. Draw two circles, spaced evenly above the head oval. Inside each eye, sketch a smaller circle for the iris and a dot for the pupil. Add curved lines beneath the eyes for eyelids if you want to suggest realism.
Below the eyes, sketch a wide, curved line for the mouth. Bullfrogs have a distinct, horizontal mouth that gives them a characteristic expression. Keep it gentle and curved slightly upward at the ends.
Step 3: Define the Body Shape
Refine the shapes you created earlier to more closely resemble the bullfrog’s natural body. Add curves to the body oval to represent the chest and abdomen. Make the head a bit more angular around the eyes and flatten the top slightly to mimic the frog’s skull shape.
Step 4: Sketch the Front Legs
From the sides of the bullfrog’s body, draw the front legs extending downward. These should be shorter and slightly bent at the elbows. At the end of each leg, draw four fingers, slightly spread, with rounded tips. Keep in mind that bullfrogs have long, thin fingers on their front limbs.
Step 5: Draw the Hind Legs
The hind legs are one of the most prominent features of a bullfrog. They should appear much larger and more muscular than the front legs. Start by sketching an angled line from the body, bending outward, then back inward toward the ground. This represents the thigh and calf area.
From the knee, draw the rest of the leg extending backward and down. Add long, webbed toes at the end, usually four visible toes that fan out. Emphasize the webbing between them by drawing curved lines connecting each toe.
Step 6: Add the Skin Texture and Details
Now that the basic shape is complete, it’s time to refine your drawing with texture and detail. Use light pencil strokes to add bumpy textures and irregular blotches across the frog’s back and legs. These markings help distinguish the bullfrog from other amphibians.
Draw small lines around the limbs and eyes to add definition. You can also add folds or wrinkles where the legs meet the body, or along the sides of the torso. Be careful not to overdo it bullfrogs have smooth skin, and excessive lines may make them look rougher than they are.
Step 7: Outline and Erase Unnecessary Lines
Once your sketch is complete, go over the final lines with a slightly darker pencil or ink pen if desired. This helps clean up the image and make the form more visible. Carefully erase all the initial construction lines that are no longer needed, such as the overlapping ovals or guidelines.
Step 8: Shade and Add Depth
To bring your bullfrog to life, add shading to indicate light and shadow. Determine your light source, then shade the opposite sides of the body accordingly. Use gentle, layered strokes for soft shadows and blend using a stump or cotton swab if desired.
Darken areas under the chin, beneath the belly, inside the legs, and between the toes. Add subtle shadows under the eyes and mouth to give the face more definition. Make sure the shading transitions gradually for a natural appearance.
Tips for Drawing a Realistic Bullfrog
- Study reference images: Observing real bullfrogs helps you understand their posture, skin texture, and anatomy.
- Work lightly: Start with light pencil lines so you can easily adjust proportions and shapes.
- Take your time: Don’t rush through details good results often come from patience and observation.
- Practice different poses: Try sketching a bullfrog in a crouching or jumping pose to improve your skills.
- Use natural curves: Avoid stiff, straight lines. Frogs have soft, rounded features.
Using Color in Your Bullfrog Drawing
Once you’re happy with your pencil drawing, consider adding color. Bullfrogs typically have green, brown, and yellow tones with darker spots. Use colored pencils or watercolors to apply layers of color. Start with light tones, then build up with darker shades and spot patterns. Be sure to keep the eyes shiny and reflective for a lively appearance.
Common Mistakes to Avoid
Even with a clear process, some common errors can affect the final result. Here are a few to watch for:
- Incorrect leg proportions: Make sure the back legs are longer and more muscular than the front legs.
- Flat eyes: Add depth to the eyes with shading and highlights so they don’t appear lifeless.
- Over-shading: Too much shading can hide the natural softness of the frog’s skin. Keep it balanced.
- Ignoring anatomy: Avoid random lines every curve and muscle should have a purpose based on the frog’s structure.
Learning how to draw a bullfrog is both a creative and rewarding process. By following step-by-step instructions, practicing regularly, and paying attention to detail, you can create lifelike and expressive bullfrog drawings. With time, your observation skills will sharpen, and your technique will improve. Whether you’re drawing for fun, school, or artistic development, the key is to enjoy the process and keep exploring new poses and styles. Bullfrogs, with their strong forms and curious eyes, are an excellent subject for any aspiring artist.