Maximizing space in a small room can be a real challenge, especially in shared apartments, dorms, or compact urban homes. One smart solution that works well for both adults and students is lofting a bed. By lifting the bed off the ground and creating open space underneath, you can add storage, a desk, or a cozy reading nook without sacrificing square footage. This topic will walk you through everything you need to know about how to loft a bed, from planning and safety to the actual installation process.
Why Loft a Bed?
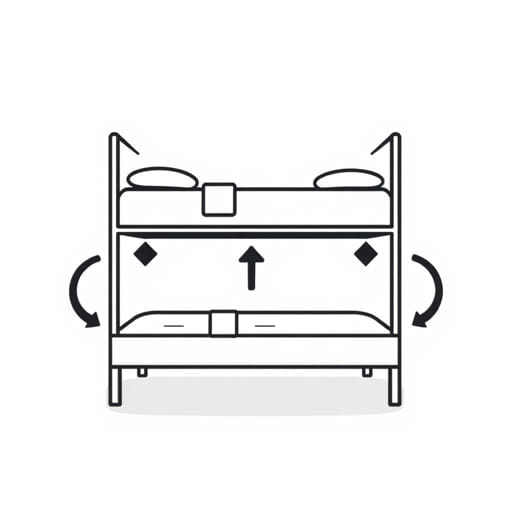
Lofting a bed is an excellent way to make the most of vertical space. Whether you want to create a study area or additional storage, this setup transforms your room’s layout significantly. Lofted beds are especially popular in dorm rooms, kid’s rooms, and studio apartments. Here are a few reasons why people choose to loft their beds:
- Save floor space: Gain room for desks, drawers, or lounging.
- Organize better: Reduces clutter and encourages smarter storage solutions.
- Customize your space: Adds personality and functionality.
Preparing to Loft a Bed
Measure Your Space
Before lofting a bed, it’s essential to measure the height of your ceiling and the dimensions of the bed. You want to ensure there’s enough clearance so you can sit up in bed without hitting your head. Ideally, you should have at least 36 inches between the top of the mattress and the ceiling.
Choose the Right Lofting Method
There are different ways to loft a bed, and your choice will depend on whether you’re lofting a standalone bed or working with a bunk bed. The common methods include:
- Using bed risers or lofting kits
- Building a custom loft bed frame
- Purchasing a pre-built loft bed
For DIY enthusiasts, building your own loft bed frame from scratch can be more cost-effective and customizable. However, using a kit or risers is quicker and often safer if you don’t have carpentry skills.
Tools and Materials Needed
If you decide to build your own loft or modify an existing bed, here are some basic tools and materials you may need:
- Measuring tape
- Power drill and screwdriver
- Saw (if building from wood)
- Wood planks or metal frame parts
- Lag bolts and nuts
- Sandpaper and wood finish (for wooden frames)
- Bed slats or a box spring support
Step-by-Step Guide: How to Loft a Bed
Step 1: Disassemble the Existing Bed (if needed)
If you’re modifying a standard bed frame, start by carefully disassembling it. Remove the mattress and any slats or side rails. Keep all screws and bolts in a container for reuse if applicable.
Step 2: Assemble or Attach Lofting Supports
If using a lofting kit or risers, follow the manufacturer’s instructions to install them securely to each leg of the bed. For DIY builds, begin by constructing four sturdy posts that will serve as the bed’s legs. Attach the legs to the corners of the bed frame with bolts or metal brackets.
Step 3: Secure the Frame
Whether you are using wood or metal, the frame must be solid and free of wobble. Use diagonal braces or support beams to stabilize the structure. Make sure all bolts and screws are tightened properly.
Step 4: Add Guardrails and Ladder
For safety, especially in children’s rooms, guardrails on both sides are essential. Install the rails using wood screws or brackets. A secure ladder or staircase should also be attached to the bed frame for easy access to the top bunk.
Step 5: Test for Stability
Before placing the mattress on the lofted bed, gently shake the structure to ensure it doesn’t move or creak. Sit and lie down on the bed to test for stability. Check again after a few days to make sure no joints have loosened.
Safety Considerations
Weight Limits
Always check the weight capacity of your loft bed setup. Commercial kits usually come with a maximum weight recommendation, while DIY builders should estimate based on materials used. Remember to account for the mattress, bedding, and the person using the bed.
Proper Anchoring
If your floor is uneven or the bed shifts easily, consider anchoring the frame to the wall for added safety. Use appropriate brackets and make sure you’re drilling into a wall stud, not just drywall.
Mattress Fit
Ensure that your mattress fits snugly within the frame and does not rise too high above the guardrails. A mattress that’s too thick can be a fall hazard, especially for younger users.
Ideas for the Space Under a Lofted Bed
One of the biggest benefits of lofting a bed is the newfound space underneath. Here are some creative ideas to make the most of it:
- Home office: Add a desk, chair, and shelves to create a personal workstation.
- Closet space: Install a hanging rod and storage bins for clothes and shoes.
- Reading nook: Use rugs, cushions, and soft lighting to create a cozy corner.
- Mini lounge: Place a small sofa, beanbag, or gaming setup for relaxation.
Maintenance Tips for Lofted Beds
Inspect Regularly
Check your bed frame every few months for any loose bolts or signs of wear, especially if it’s frequently climbed or used by children. Tighten and repair as needed to ensure long-term safety.
Keep It Clean
The space under a loft bed can easily collect dust. Vacuum or mop regularly, and if you’re using it for storage, keep items in sealed bins to avoid clutter.
Update as Needed
As your needs change, you can reconfigure the area under your loft bed. From workspace to entertainment zone, the options are nearly endless with a lofted design.
Learning how to loft a bed opens up valuable possibilities for small or multifunctional living spaces. Whether you build a loft bed from scratch, purchase a ready-made one, or use risers to elevate your existing frame, the results can be transformative. With proper planning, tools, and safety in mind, you can create a room that feels twice as big and twice as functional. Make sure to maintain your setup regularly and enjoy the benefits of smarter, more efficient living.