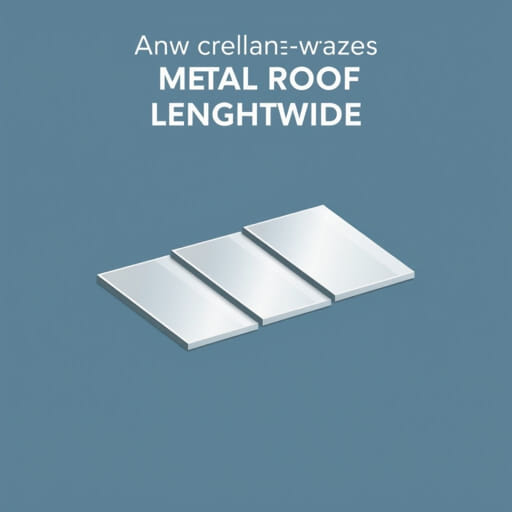
When installing metal roofing panels, overlapping them lengthwise is essential to ensure a watertight, weather-resistant surface. Whether you’re a DIY enthusiast or a contractor, understanding the correct process for overlapping metal roofing lengthwise is key to avoiding leaks, rust, or structural issues. This method of installation is especially useful in climates where rain and snow are frequent, as improper overlaps can lead to trapped moisture. By following the correct steps and using the right materials, you can achieve a professional finish that lasts for decades.
Understanding the Importance of Proper Overlapping
Lengthwise overlapping of metal roofing panels is not just about appearance it serves a functional purpose. When done correctly, it:
- Prevents water infiltration under the panels
- Supports better wind resistance
- Reduces the chance of corrosion between metal sheets
- Improves structural stability across the roof
Without a proper overlap, metal roofs are susceptible to leaks, especially at the seams. Therefore, learning how to overlap metal roofing panels lengthwise should be a priority before any installation begins.
Choosing the Right Metal Roofing Panels
Before starting the overlapping process, it’s important to select high-quality metal roofing panels designed for overlapping installation. Most panels come with a built-in ridge or lip that facilitates overlap. Panels can be made from steel, aluminum, or copper and may be coated with a weather-resistant finish for longevity.
Common Types of Metal Panels
- Corrugated Panels Feature wave-like shapes and are ideal for simple overlapping methods.
- Standing Seam Panels Have raised interlocking seams that conceal fasteners.
- R-panel or U-panel Commonly used in residential and commercial buildings for a balance of cost and performance.
Tools and Materials You’ll Need
Gather all necessary tools and materials before starting the installation process:
- Measuring tape
- Metal roofing panels
- Metal snips or circular saw with a metal-cutting blade
- Drill with metal screws (self-tapping recommended)
- Chalk line for alignment
- Butyl tape or waterproof sealant
- Safety equipment: gloves, goggles, ladder, and harness
Preparing the Roof Surface
Before placing the metal panels, make sure the roof deck is clean, dry, and structurally sound. Apply a roofing underlayment to create a moisture barrier. The underlayment can be synthetic or felt, depending on local building codes and climate. Install the underlayment horizontally from the bottom up, overlapping each layer.
How to Overlap Metal Roofing Panels Lengthwise
1. Start with the First Panel
Position the first panel at one end of the roof, making sure it overhangs the eave by about an inch. Align the panel straight using a chalk line, then secure it using self-tapping screws. Place screws along the panel’s flat edge at every second or third corrugation, spacing them about 1218 inches apart vertically.
2. Determine the Overlap Width
Lengthwise overlaps should be at least one corrugation wide or about 6 to 8 inches, depending on the panel design and manufacturer’s recommendations. Some panels come with a pre-formed lip to guide the overlap, which simplifies this step.
3. Apply Sealant or Butyl Tape
To prevent water from seeping through the overlapped section, apply a strip of butyl tape or roofing sealant along the edge where the next panel will overlap. This creates a watertight seal and prevents moisture buildup between the layers.
4. Position the Second Panel
Place the second panel over the first one, overlapping it along the lengthwise edge. Ensure the side lap fits snugly, with no visible gaps. Use a gentle downward pressure to compress the sealant or tape between the panels. Make sure the vertical alignment remains straight by using the chalk line as a reference.
5. Secure the Panels
Once aligned, fasten the second panel with screws through both overlapping layers. Screws should penetrate the high point of the corrugation to avoid water pooling around them. Continue this process along the entire roofline, overlapping each new panel over the previous one lengthwise.
6. Inspect the Seams
After installing a few panels, pause to inspect the seams. Check for tight connections, consistent overlap widths, and sealed joints. If necessary, add extra sealant or fasteners where gaps are present. This is a good time to make adjustments before progressing further up the roof.
Tips for Effective Overlapping
- Always install panels from the opposite direction of the prevailing wind to avoid wind-driven rain entering the seams.
- Ensure overlaps face downward (toward the eave) to aid water runoff.
- Don’t overtighten screws, as this can damage the panel or deform the overlap.
- Use color-matched fasteners for a more seamless appearance.
- Wear gloves to avoid injury from sharp metal edges during handling and cutting.
Dealing with Roof Features and Obstructions
If your roof has chimneys, skylights, or vents, you’ll need to trim panels accordingly. Always cut panels before securing them in place. Ensure that any panel you modify still maintains the required overlap length. Use flashing and sealant around obstructions to maintain a waterproof surface.
Finishing the Installation
After all the panels are in place and securely fastened, install ridge caps along the roof peak to cover the top seams. End caps and gable trim should also be applied to the sides for a complete and finished look. Double-check that all overlaps, especially those lengthwise, are properly sealed and aligned.
Maintenance and Longevity
Properly overlapped and sealed metal roofing can last 40 to 70 years. To maintain its durability, inspect overlaps and fasteners every few years. Remove debris buildup that may trap moisture. If you notice loose screws or compromised overlaps, reseal or replace panels as needed to prevent structural damage.
Overlapping metal roofing panels lengthwise is a key step in ensuring a durable and weather-resistant roof. With the right materials, accurate measurements, and careful alignment, the overlapping process not only enhances performance but also extends the lifespan of your roof. Whether you’re tackling a small shed or a full-scale home project, mastering this technique will help you achieve a secure and professional result.