Spackling is a simple yet essential part of home improvement and wall maintenance. Whether you’re fixing nail holes, minor dents, or shallow cracks in drywall, learning how to use spackle properly can help restore walls to a smooth, paint-ready finish. It’s a quick fix that doesn’t require professional experience, and with the right technique, anyone can do it. Knowing how to apply spackle the right way saves time, improves the look of your walls, and can even boost property value by maintaining a polished, well-kept interior. Below is a clear guide to using spackle correctly and efficiently.
What is Spackle?
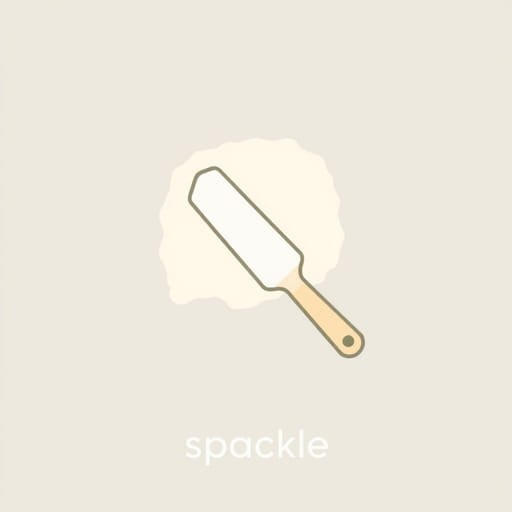
Spackle is a type of lightweight compound designed to fill small holes, cracks, and surface imperfections in walls, ceilings, and other surfaces. It typically comes pre-mixed in a tub and is easy to apply using a putty knife. Once dried, it can be sanded smooth and painted over. Spackle is ideal for repairing minor surface damage on drywall, wood, or plaster before painting or decorating.
Types of Spackle
- Lightweight Spackle: Best for small holes and easy sanding. Dries quickly.
- Vinyl Spackle: A bit heavier, good for deeper repairs up to ¾ inch deep.
- Acrylic Spackle: Offers good flexibility and works for exterior or damp areas.
- Epoxy Spackle: Strong and durable, best used for high-impact areas or wood repairs.
Tools and Materials You’ll Need
Before getting started, gather all the necessary tools and materials for a smooth process. Here’s what you’ll need:
- Spackle compound (choose the type suited for your repair)
- Putty knife (2′ to 6′ wide, depending on hole size)
- Sanding sponge or fine-grit sandpaper (150220 grit)
- Damp cloth or sponge
- Paint and primer (if repainting)
- Drop cloth or old sheet to protect floors
Preparing the Area
Step 1: Clean the Surface
Before applying spackle, ensure the damaged area is clean and free of dust, dirt, or loose debris. Use a dry cloth or vacuum with a brush attachment to remove ptopics. For greasy or dirty walls, lightly wipe with a damp cloth and let the surface dry completely.
Step 2: Assess the Damage
Determine whether the hole or crack is suitable for spackle. Small nail holes, pinholes, and fine cracks are ideal. For larger holes over ¾ inch in depth or diameter, you might need joint compound or drywall patches instead of regular spackle.
How to Apply Spackle
Step 3: Load the Putty Knife
Using your putty knife, scoop a small amount of spackle from the container. You don’t need a lot a little goes a long way, especially for minor damage. Holding the knife at a slight angle helps you control the application better.
Step 4: Apply to the Wall
Press the spackle directly into the hole or crack, then smooth it over using the edge of the putty knife. Try to feather the edges outward so the spackle blends into the surrounding wall. Avoid leaving thick clumps, as this can result in more sanding later.
Step 5: Remove Excess Spackle
Once the hole is filled, scrape off excess material from the surface. A smooth, even finish will make sanding easier. Let the spackle dry according to the product’s instructions usually 15 to 60 minutes for lightweight types, but it can take longer for deeper applications.
Sanding the Surface
Step 6: Let it Fully Dry
Before sanding, make sure the spackle is completely dry. Touch it lightly if it feels firm and no longer damp, it’s ready. Sanding too early can ruin the patch and force you to reapply.
Step 7: Sand Smooth
Using fine-grit sandpaper or a sanding sponge, gently sand the patched area until it’s flush with the wall. Don’t press too hard, especially on drywall, as this could damage the paper layer or gouge the spackled spot.
Step 8: Wipe Down the Dust
After sanding, use a damp cloth or sponge to remove dust and residue from the area. This ensures a clean surface before you apply paint or primer.
Priming and Painting
Step 9: Apply Primer
Priming is important, especially when spackling over colored walls. Spackle tends to absorb paint differently than the surrounding surface. A coat of primer ensures the paint adheres evenly and the patch doesn’t show through.
Step 10: Paint the Wall
Once the primer is dry, paint over the repaired spot using the same paint used on the rest of the wall. For best results, use a small brush or roller and blend the edges into the surrounding area. In many cases, two coats will create the most seamless look.
Tips for Best Results
- Use a flexible putty knife to help spread the spackle evenly.
- Apply spackle in thin layers for deeper holes allow each to dry before adding another.
- Don’t rush the drying process spackle needs time to fully cure.
- Label and seal the container tightly for future use to prevent it from drying out.
Common Mistakes to Avoid
- Applying too much spackle at once, leading to a messy surface and extra sanding.
- Skipping the sanding step, resulting in a noticeable bump or uneven texture.
- Painting over without priming, which can cause discoloration or uneven coverage.
- Using the wrong type of spackle for the job match your product to the damage level.
When Not to Use Spackle
While spackle is great for cosmetic repairs, it’s not suitable for structural fixes or very large holes. If the drywall is crumbling or if there’s moisture damage behind the wall, those issues should be addressed first. In such cases, replacing a portion of the drywall or using joint compound may be necessary.
Knowing how to use spackle is a practical skill every homeowner and renter should have. It’s a fast and effective way to fix everyday wall damage, keeping your home looking neat and well-maintained. Whether you’re prepping to repaint or just tidying up after rearranging wall art, spackling is a cost-effective solution that anyone can master. With a little patience and attention to detail, your walls can be restored to a flawless condition in no time.