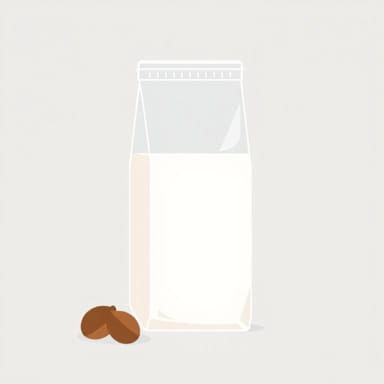
Making your own plant-based milk at home has become increasingly popular among health-conscious individuals and culinary enthusiasts. One essential tool in this process is the nut milk strainer bag. Whether you’re blending almonds, cashews, oats, or even hemp seeds, a nut milk strainer bag helps separate the smooth liquid from the leftover pulp. Its function might seem simple, but choosing the right bag and knowing how to use it properly can make a big difference in your homemade milk’s texture and taste.
What Is a Nut Milk Strainer Bag?
A nut milk strainer bag, also known as a nut milk bag or fine mesh strainer bag, is a reusable kitchen tool used to strain liquid from blended ingredients. It is especially useful in making dairy-free milks such as almond milk, oat milk, soy milk, and coconut milk. The bag allows liquid to pass through while capturing the solid ptopics, resulting in a creamy, smooth drink free from grit or pulp.
Materials Commonly Used
Nut milk strainer bags are typically made from:
- Nylon mesh: Durable, quick-drying, and resistant to mold or bacteria.
- Cotton or organic cotton: Eco-friendly and breathable, but may stain or wear out faster.
- Hemp fiber: Sustainable and natural, although sometimes coarser in texture.
The choice of material can affect the ease of cleaning, the longevity of the bag, and the final result of your nut milk. Nylon is often favored for its strength and resistance to tearing, especially when squeezing out thick mixtures.
Why Use a Nut Milk Strainer Bag?
While you could use a traditional cheesecloth or even a fine mesh sieve, nut milk strainer bags offer several advantages. First, they are specifically designed to be strong and stretchable, allowing for efficient squeezing without tearing. Second, they are reusable, making them a more environmentally friendly option. Third, they are typically shaped like a pouch with a drawstring or elastic opening, making them easier to manage during straining.
Benefits of Using Nut Milk Strainer Bags
- Produces smoother, creamier nut milk
- Reusable and cost-effective over time
- Multi-purpose for other recipes like cold brew coffee or juice
- Reduces kitchen waste
How to Use a Nut Milk Strainer Bag
Using a nut milk strainer bag is simple, but doing it correctly ensures the best results. Here’s a step-by-step guide:
Step 1: Soak Your Nuts or Seeds
Begin by soaking your chosen nuts or seeds (like almonds or cashews) in water for several hours or overnight. This softens them, making them easier to blend and enhancing the milk’s creaminess.
Step 2: Blend with Fresh Water
Drain and rinse the soaked nuts, then add them to a blender with fresh filtered water. Blend until the mixture is smooth and creamy, usually around 1 to 2 minutes depending on your blender’s power.
Step 3: Strain Through the Bag
Place the nut milk strainer bag over a large bowl or pitcher. Pour the blended mixture into the bag slowly. Gather the bag at the top and twist to close it. Begin squeezing gently at first, then more firmly, to extract as much liquid as possible. The remaining pulp can be composted or reused in baking, smoothies, or granola.
Step 4: Store the Milk
Transfer the freshly strained milk into a clean glass container. It should be stored in the refrigerator and consumed within 3 to 5 days for best quality.
Cleaning and Maintenance Tips
Proper care of your nut milk strainer bag will help it last longer and prevent unpleasant odors or bacterial buildup.
- Rinse the bag immediately after use to remove pulp.
- Wash with warm, soapy water and rinse thoroughly.
- Hang the bag to air dry completely before storing.
- Occasionally soak in vinegar or baking soda solution for deep cleaning.
Some bags are machine washable, but always check the manufacturer’s instructions. Avoid using fabric softener or bleach, as these may damage the bag or leave harmful residues.
Other Uses for a Nut Milk Strainer Bag
Although designed for straining nut milk, these versatile bags have many other uses in the kitchen:
- Cold brew coffee: Soak ground coffee in water and strain it with the bag.
- Herbal infusions: Steep herbs for tea or infuse oils without stray ptopics.
- Juicing: Blend fruits or vegetables and strain for smooth juice without pulp.
- Sprouting: Use the bag to rinse and drain seeds for sprouting microgreens or legumes.
- Greek yogurt: Strain regular yogurt to remove whey and make it thicker.
Choosing the Right Nut Milk Strainer Bag
When shopping for a nut milk bag, consider the following features to find the one that suits your needs best:
- Size: Standard bags range from 8×10 inches to 12×12 inches. Larger bags are ideal for big batches.
- Mesh tightness: Finer mesh results in smoother milk but takes longer to strain.
- Ease of cleaning: Nylon is easier to rinse and less prone to odor absorption.
- Durability: Double-stitched seams and strong fabric reduce the risk of tearing.
Reading reviews and checking how easy it is to handle with wet hands can also help in making your decision. Some bags also come with additional features such as rounded corners for easier cleaning or reinforced tops for better grip during squeezing.
Nut Milk Strainer Bag vs. Cheesecloth
Cheesecloth has traditionally been used for similar purposes, but there are some differences:
- Reusability: Nut milk bags last longer and are easier to wash than cheesecloth.
- Efficiency: Bags are more efficient in squeezing out liquid without tearing.
- Convenience: Drawstring design makes bags easier to handle compared to loose cheesecloth.
For those making plant-based milk regularly, investing in a high-quality nut milk strainer bag is definitely worth it.
Whether you’re a vegan, lactose-intolerant, or simply enjoy fresh homemade beverages, a nut milk strainer bag is a must-have kitchen tool. It’s versatile, easy to use, and environmentally friendly. With the right strainer bag, you can elevate your nut milk experience, ensuring smooth and delicious results every time. From almond milk to cold brew coffee, its uses are wide-ranging and practical, making it an invaluable addition to any modern kitchen.