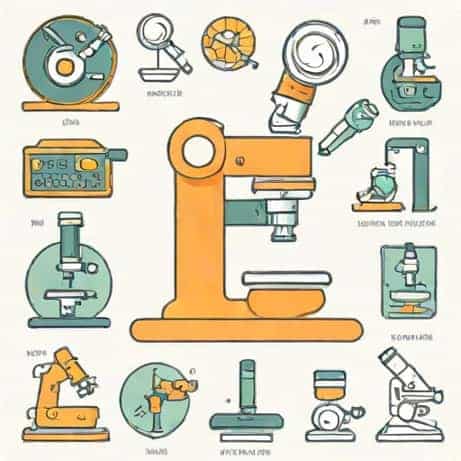
The microscope is one of the most important tools in biology and scientific research, allowing scientists, students, and enthusiasts to observe objects that are too small to be seen with the naked eye. Understanding the parts of a microscope and how they function is essential for effective use, whether in a classroom, laboratory, or research setting. Diagrammatically identifying the various parts of a microscope not only helps in proper handling but also enhances comprehension of how magnification and resolution are achieved. This knowledge is fundamental for anyone studying biology, microbiology, or related fields, as it provides a clear framework for observing microscopic specimens accurately.
Main Components of a Microscope
A microscope consists of several key parts, each with a specific function that contributes to the magnification and clarity of the specimen being studied. These parts can be categorized into structural, optical, and mechanical components. Understanding these elements and their roles is crucial for both beginners and advanced users.
Structural Parts
The structural components provide support and stability to the microscope, ensuring that optical elements are aligned correctly for precise observations. The main structural parts include
- BaseThe bottom support of the microscope that provides stability and prevents tipping during use.
- ArmThe part that connects the base to the upper components, allowing the user to carry and position the microscope safely.
- StageA flat platform where the specimen slide is placed. Many stages include clips or mechanical systems to hold the slide steady and allow smooth movement.
- Stage ClipsClips or mechanical devices on the stage that secure the slide in place during observation.
Optical Components
Optical components are responsible for magnifying the specimen and producing a clear image for observation. These include
- Eyepiece (Ocular Lens)The lens through which the observer looks. It typically provides a magnification of 10x or 15x.
- Objective LensesLocated on a rotating nosepiece, these lenses provide different levels of magnification, usually ranging from 4x to 100x. Common types include low power, medium power, high power, and oil immersion lenses.
- CondenserA lens system below the stage that focuses light onto the specimen, enhancing image clarity and brightness.
- Diaphragm (Iris or Disc)Controls the amount of light passing through the specimen, improving contrast and resolution.
Mechanical Components
Mechanical components allow precise adjustments and movements to achieve a focused and clear image. These include
- Coarse Focus KnobA larger knob used for rough focusing by moving the stage or objective lenses up and down quickly.
- Fine Focus KnobA smaller knob used for precise focusing, enabling detailed adjustments after coarse focus.
- Nosepiece (Revolving Turret)Holds the objective lenses and allows rotation to change magnification easily.
- Body Tube (Head)Connects the eyepiece to the objective lenses, maintaining proper alignment for light and image formation.
Diagrammatic Identification and Use
When diagrammatically identifying the parts of a microscope, it is important to label each component clearly, showing its location and function. Diagrams typically present a side view, illustrating how the eyepiece, objective lenses, stage, and focusing knobs relate to each other. This visual representation aids in understanding the flow of light from the source, through the condenser and specimen, to the eyepiece, producing a magnified image for observation.
Step-by-Step Identification
To diagrammatically identify the parts of a microscope
- Start by labeling the base and arm to establish the structural framework.
- Mark the stage and stage clips, showing where the specimen is placed.
- Identify the light source, whether a mirror or built-in illumination system, beneath the stage.
- Label the condenser and diaphragm to indicate the light control system.
- Show the body tube connecting the eyepiece and objective lenses.
- Label each objective lens on the revolving nosepiece to indicate magnification levels.
- Mark the coarse and fine focus knobs for image adjustment.
Understanding Function Through Diagrammatic Representation
By creating or studying a labeled diagram of a microscope, users can better understand how each part contributes to the magnification process. For instance, the eyepiece and objective lenses work together to produce the total magnification, which is calculated by multiplying the eyepiece magnification by the objective lens magnification. The stage and clips hold the specimen steady, while the focusing knobs allow precise adjustments to bring the image into clarity. The condenser and diaphragm optimize lighting and contrast, which is crucial for observing fine details in the specimen.
Practical Tips for Microscope Use
- Always start with the lowest power objective lens and gradually move to higher magnifications.
- Adjust the diaphragm and condenser to control light intensity and contrast for the best image quality.
- Use coarse focus first to get a rough image, then fine focus to sharpen details.
- Handle the microscope by the arm and base to prevent damage and maintain alignment of optical components.
- Keep lenses clean and free of dust or oil for clear observation.
Applications of Microscopes
Understanding the parts of a microscope is essential because proper use directly impacts scientific observation. Microscopes are used in many fields, including
- Biology and microbiology for studying cells, tissues, and microorganisms.
- Medical laboratories for examining blood, bacteria, and pathogens.
- Education for teaching students about microscopic structures.
- Material science for examining surfaces, fibers, and crystalline structures.
- Research in pharmacology, environmental science, and nanotechnology.
Diagrammatically identifying the various parts of a microscope provides a clear understanding of how this important scientific instrument works. Each component, from the base and arm to the eyepiece, objective lenses, condenser, and focus knobs, plays a crucial role in producing a clear, magnified image of microscopic specimens. By learning the location and function of these parts, students, researchers, and enthusiasts can use the microscope effectively, ensuring accurate observations and minimizing the risk of damage to the instrument. Mastery of microscope components not only enhances practical laboratory skills but also deepens comprehension of the fundamental principles of optics, magnification, and light control. Understanding these parts diagrammatically also aids in proper maintenance, safe handling, and effective teaching, making the microscope an indispensable tool in science and education.